How to Create a Rain Garden in Your Yard
Do heavy rainfalls cause water to puddle in your yard? Then, consider converting that low, troublesome spot into a rain garden! It’s an excellent DIY project that can benefit your property and help your community.
Heavy rainfalls often overwhelm sewer and stormwater drainage systems and cause local flooding, especially in communities that have experienced recent growth. More buildings, streets, and parking lots also mean fewer permeable surfaces to absorb water.
As water washes across yards and roads, it also carries chemicals from lawn fertilizers and oil, salt, and other pollutants from vehicles. Rainwater may originate from clouds, but storm runoff isn’t pure rainwater.
Since rain gardens act like mini retention ponds, they’re an excellent way to improve water drainage in your lawn, help protect your home from flooding, and support the environment.
What’s a rain garden?
The term “rain garden” can be misleading. Many people presume a rain garden is constantly wet, like a marshy bog, and attractive to mosquitos. Instead, rain gardens act more like a sponge, ready to absorb water when needed but also capable of drying out between wet spells.
To add a rain garden to your yard:
Step 1. Choose the best location
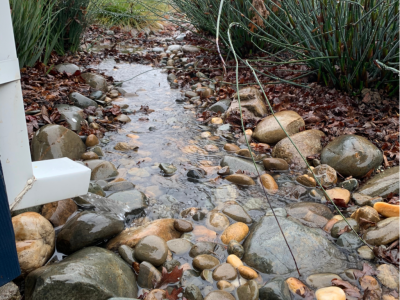
Low spots that already collect water are ideal. But you can also build a rain garden in any location where rainwater can easily flow from downspouts or a sump pump. In addition, you may need to install underground PVC pipes or create above-ground drainage channels lined with river rock to help direct water into the garden.
Make sure your rain garden is at least 10 feet away from your home! You don’t want the water collecting in the garden saturating your foundation. Also, don’t install a rain garden over a septic tank or underground utility lines.
Step 2. Prepare the garden
Your rain garden should slowly release all the water it collects within 24 hours. According to the USDA, the surface of a rain garden is typically six to nine inches below the surrounding yard. The flat area in the middle will gather and absorb more water than the slanting edges.
In a sloped lawn, dig out the high side and build a berm across the low side. Amend the soil with sand, compost, and topsoil to improve drainage and provide a nutritious plant environment.
Step 3. Plant selection
Picking plants is the most enjoyable step in creating any garden! But it’s essential to make good choices.
Deep-rooted native perennials typically perform best since they’re highly adapted to the local environment. They also excel at absorbing water and slowly releasing it.
In addition to selecting perennials suited to your growing zone, choose a mixture of plants based on where you’ll position them. The upper edges should have varieties that can tolerate dry conditions; the deepest area needs plants that can handle “average to moist” conditions. Use plants that prefer “average to dry” soil on the slopes between the high and low areas.
Step 4. Care and maintenance
Young plants need time and tender loving care to become established. Add shredded hardwood mulch to your new garden, weed it regularly, and use a rain gauge to monitor precipitation during the first growing season.
A new rain garden requires roughly an inch of water a week. However, a sudden flood can overwhelm young plants. To prevent this, cut a notch in the low of your garden so water can easily overflow. After the first season, close this escape route so your garden can maximize water retention.
Other ways to manage rain
In addition to rain gardens, you can also collect water with rain barrels. However, a single rain barrel is usually inadequate for significant rain events unless you’ve positioned one or more barrels at every downspout.
Still, rain barrels provide more flexibility than rain gardens in controlling when and where you want to use the water that lands on your roof.
